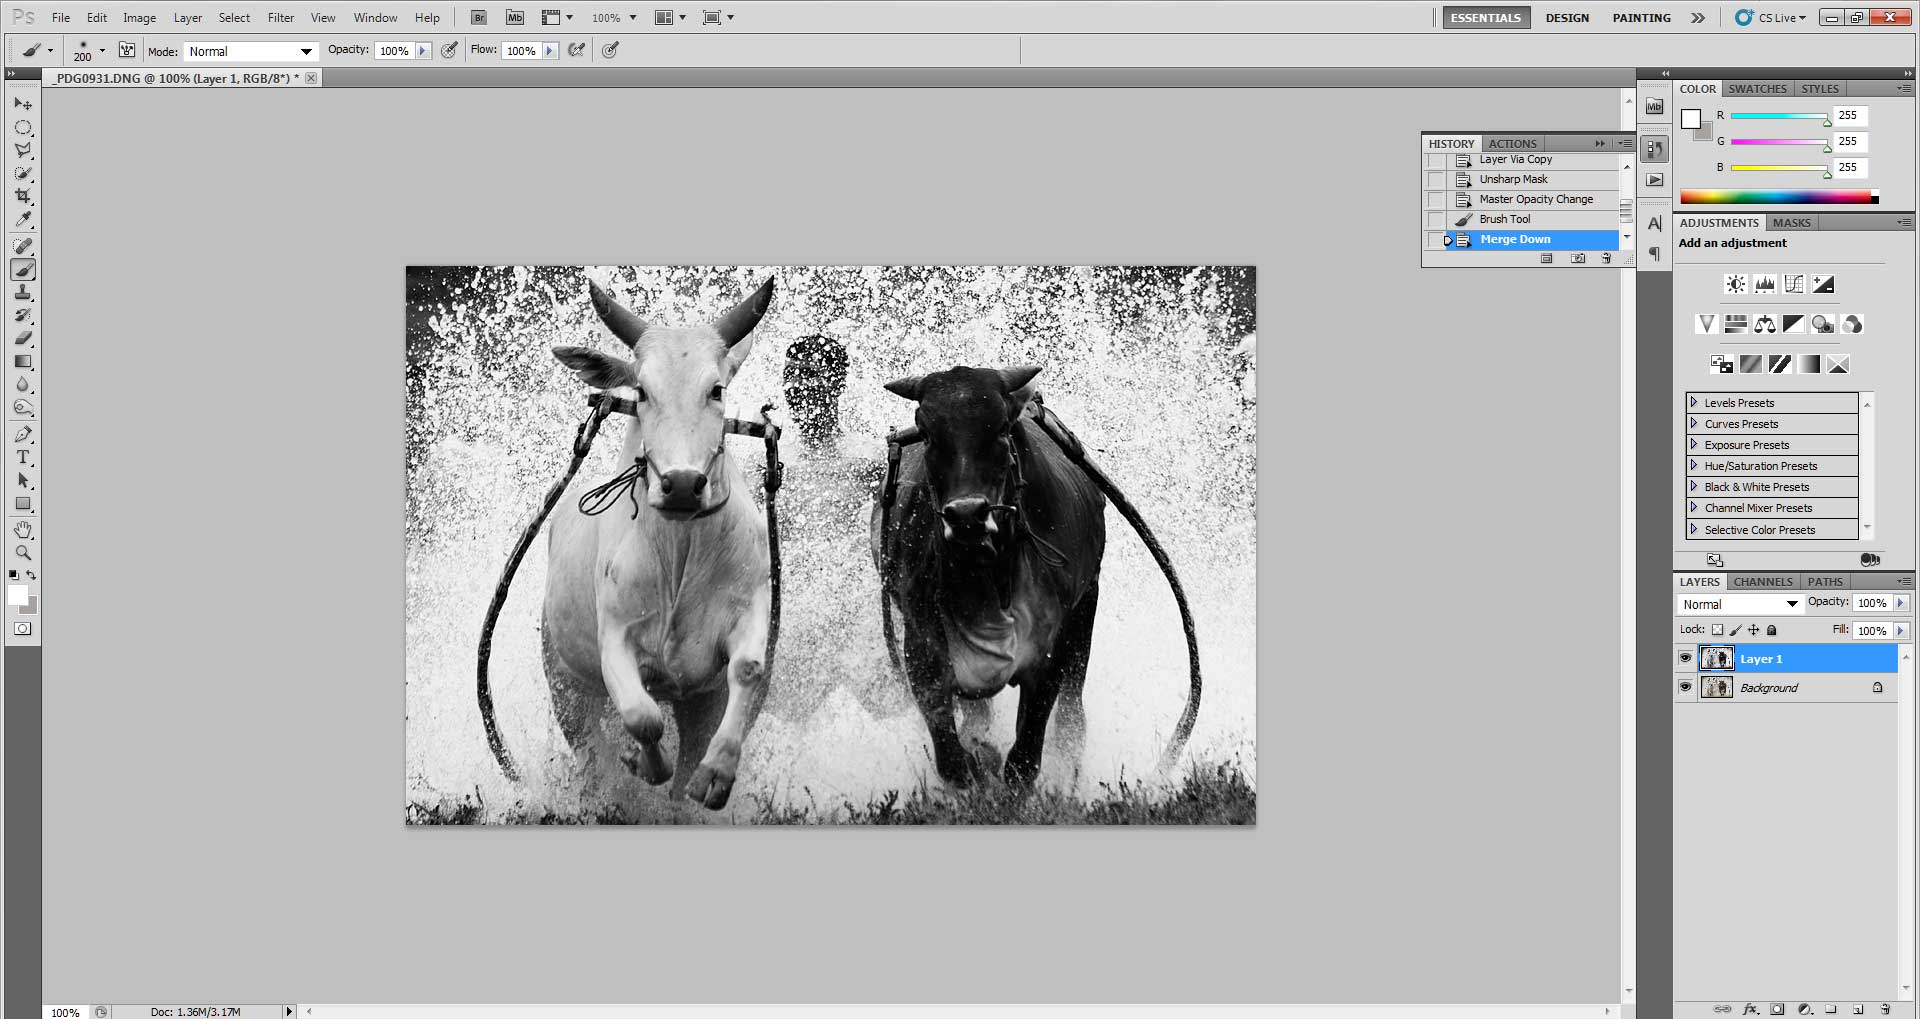
Have you ever wonder how to create an impression that the subject is jumping out of the frame? Wonder no more because I am here to show you how to do it.
1. Take a well taken action picture. Crop the picture to ensure that the part you want to appear to come out of the frame to be near the edge of the picture.
2. Do your usual post processing and resize and sharpen the image for posting.
3. Create a new layer
4. Use the Edit>stroke. A dialog box will come out and ask you how wide you want the border to be. You can choose anything from 50 to 100 px depending on how wide you want the border to be. Choose also the color of the border.
5. Create a layer mask by pressing the layer mask icon
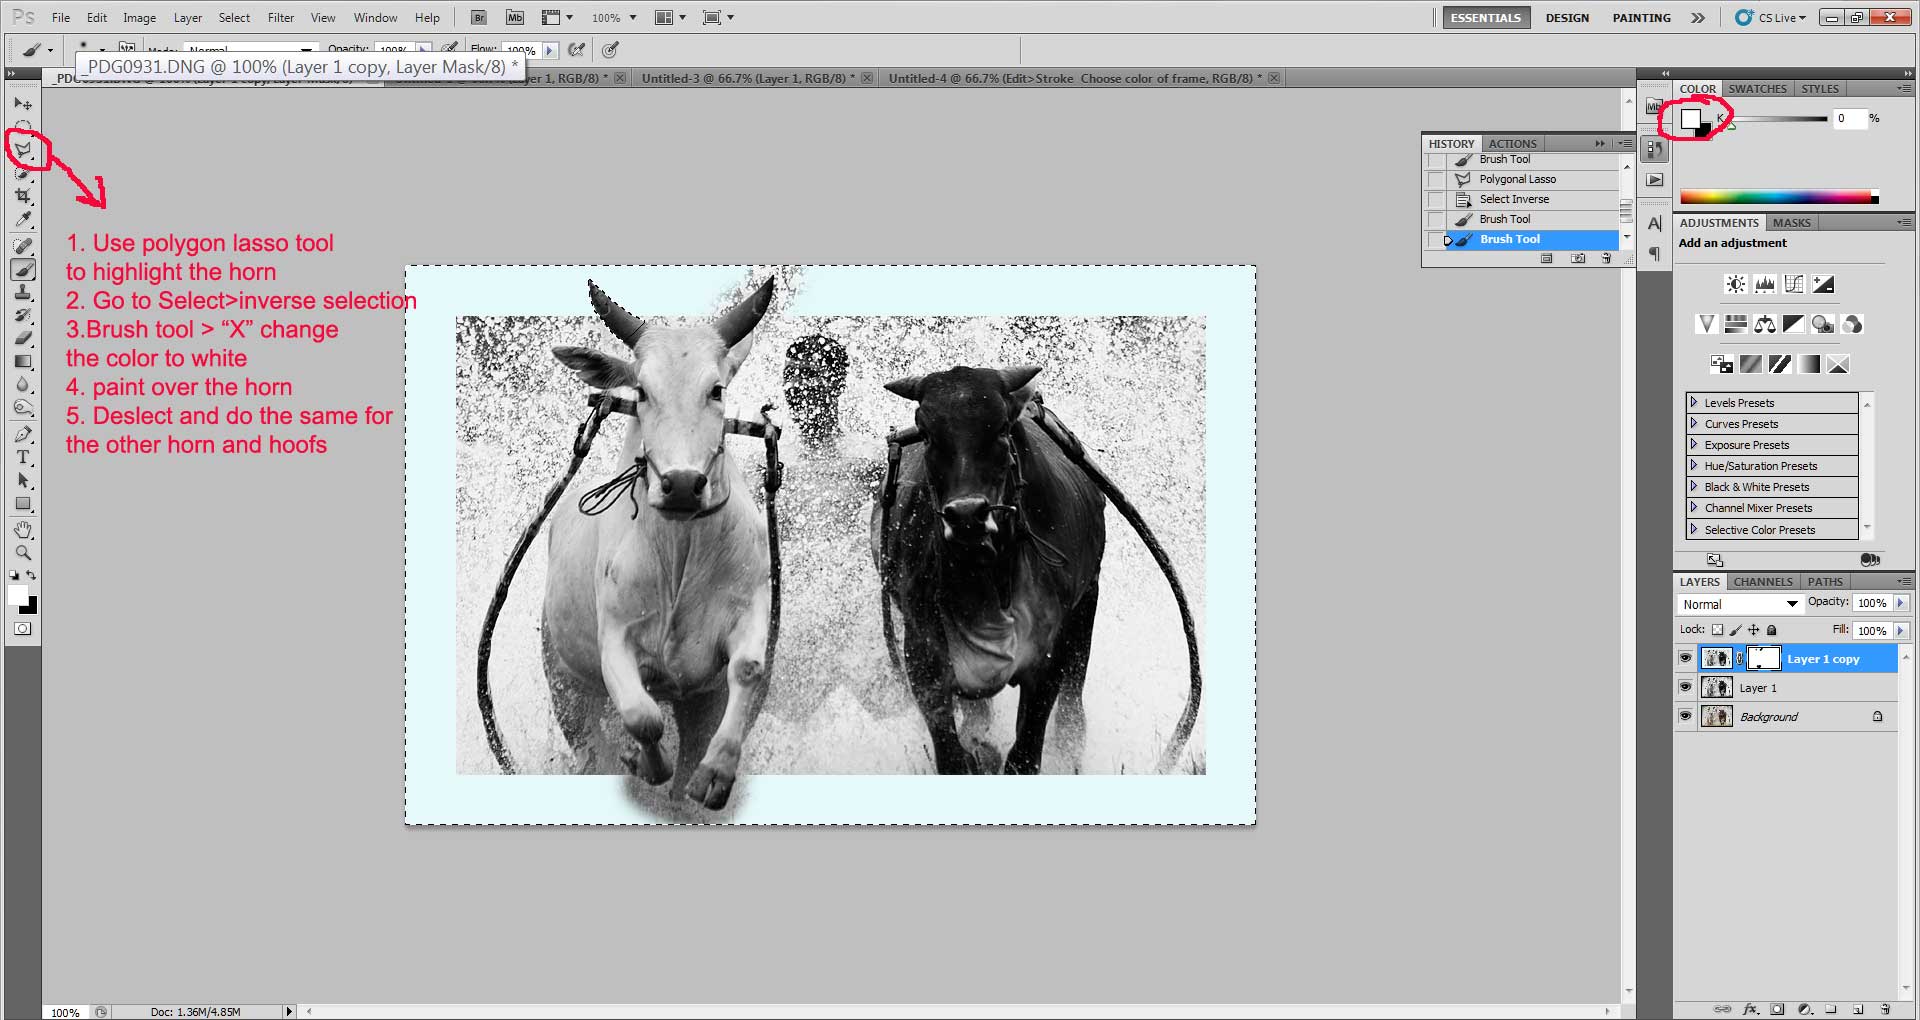
6. Use the brush and brush off the color of the border to expose the horns and hoofs (in this case)
7. Use a polygon selection tool and select the horn. After you have carefully select the shape of the horn, go to select>inverse
8. Go back to the brush, this time press “X” to inverse the selection of painting back the frame. Paint back the frame and after you have done that select>deselect.
9. Repeat the steps 7 to 8 for the rest of the areas.
10. Now you have completed your masterpiece in 10 simple steps.
Stay tune to our next How did they do it tips.
1.
2. Create the Border
4. Use a brush to reveal the horns and hoofs


